Subpart E consists of all adipic acid production facilities that use oxidation to produce adipic acid.
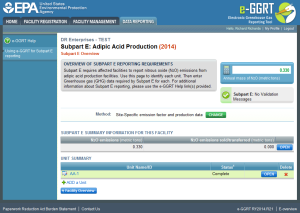
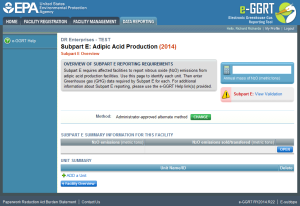
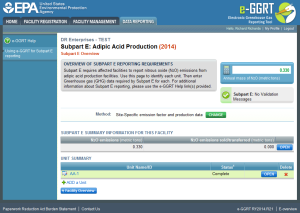
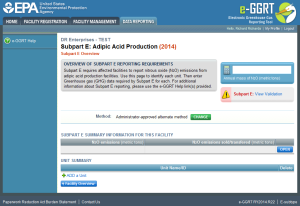
This page provides an overview of subtopics that are central to Subpart E reporting. This information is entered from the e-GGRT Subpart E Overview web form shown below. Each topic represents a key web form(s) where you need to enter information:
- Subpart E Estimation Methodology
- Subpart E Unit Information for the Site-Specific Emission Factor and Production Data Method
- Subpart E Unit Information for an Administrator-Approved Alternative Method
- Subpart E Summary Information for the Site-Specific Emission Factor and Production Data Method
- Subpart E Summary Information for an Administrator-Approved Alternative Method
Subpart E Estimation Methodology
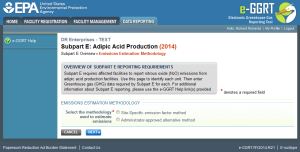
To start entering data for subpart E, click OPEN in the row for this subpart in the REPORT DATA table on the Facility or Supplier Overview page. This action will open the Emissions Estimation Methodology page.
Click this link to expand Select the methodology used to estimate emissions from the following options: If Administrator-approved alternative method is selected, e-GGRT requires you to enter the following information: Click NEXT to proceed to the Subpart E Overview page. See the applicable Subpart E Unit Information page for instructions on entering unit information:
Subpart E Unit Information for the Site-Specific Emission Factor and Production Data Method
Comlete the following steps to enter information for adipic acid production units for which you use the site-specific emission factor and production data method to estimate N2O emissions:
From the Subpart E Overview page, click on the Add a Unit link beneath the UNIT SUMMARY table.
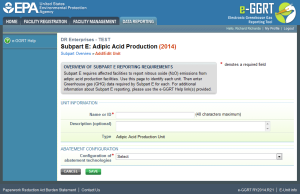
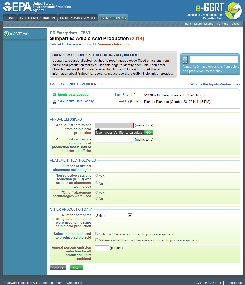
Click this link to expand This action takes you to the Add/Edit Unit page shown below.
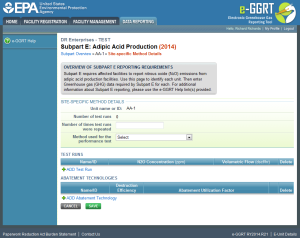
Click this link to expand Enter the following information on the Add/Edit Unit page: In the ABATEMENT CONFIGURATION section, select the configuration of abatement technologies from the following options in the dropdown: Click on SAVE to return to the Subpart E Overview page. From the Subpart E Overview page, click on the OPEN button for the unit you wish to enter information. This action will take you to the Site-Specific Method Details page for that unit, as shown in the following screenshot.
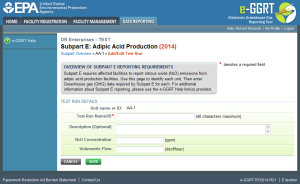
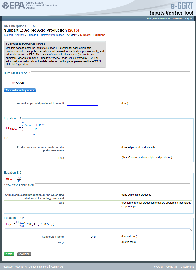
Click this link to expand Enter the following information in the SITE-SPECIFIC METHOD DETAILS section of the page: When you have finished entering this information, click on SAVE to return to the Subpart E Overview page. From the Site-Specific Method Details page for the unit, click on the Add Test Run link beneath the TEST RUNS table. This action will take you to the Add/Edit Test Run page, as shown in the next screenshot.
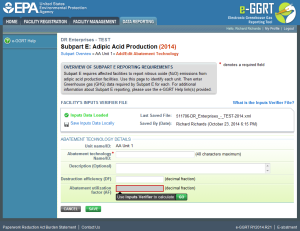
Click this link to expand Enter the following information in the TEST RUN DETAILS section of the Add/Edit Test Run page: Click SAVE to return to the Site-Specific Method Details page for the unit. Repeat this step for each test run conducted on this unit. From the Site-Specific Method Details page for the unit, click on the ADD Abatement Technology link beneath the ABATEMENT TECHNOLOGIES table. This action will take you to the Add/Edit Abatement Technology page, shown in the next screenshot.
Click this link to expand Enter the following information on the Add/Edit Abatement Technology page for the abatemet technology: Do not enter anything for the abatement utilization factor (AF), which will be calculated automatically by the Inputs Verification Tool (IVT) once all of the necessary data has been entered into e-GGRT. When you have finished entering the abatement technology information for the unit, click SAVE, which will return you to the Site-Specific Method Details page. Repeat this step to add information on any additional abatement technologies used to control emissions from the unit. Repeat steps 1 through 4 to enter information for any other adipic acid production units operated by the facility. When you are finished, click SAVE to return to the Subpart E Overview page. Step 1. Add an Adipic Acid Production Unit
Step 2. Enter Site-Specific Method Details
Step 3. Enter Information on Test Runs
Step 4. Enter Abatement Technologies Information
Subpart E Unit Information for an Administrator-Approved Alternative Method
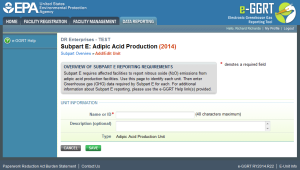
This page provides a step-by-step description of how to add unit information for a subpart E adipic acid production facility for which an Administrator-approved alternative method is used to estimate emissions. From the Subpart E Overview page, click on the Add a Unit link beneath the UNIT SUMMARY table.
Click this link to expand This action takes you to the Add/Edit Unit page shown below.
Click this link to expand Enter the following information on the Add/Edit Unit page: Click on SAVE to return to the Subpart E Overview page. Repeat Steps 1 and 2 for each adipic acid production unit at your facility.Step 1. Add an Adipic Acid Production Unit
Step 2. Enter Unit Information
Subpart E Summary Information for the Site-Specific Emission Factor and Production Data Method
This section describes how to enter summary information, including emissions, for subpart E adipic acid production facility for which the site-specific emission factor and production data method is used to estimate emissions.
The annual N2O emissions that you report to EPA must be calculated using the Inputs Verifier Tool (IVT). You can access the IVT module for subpart E from the Subpart E Summary Information page, which you reach by clicking the OPEN button in the SUBPART E SUMMARY INFORMATION FOR THIS FACILITY table in the Subpart E Overview page, as shown in the next screenshot.
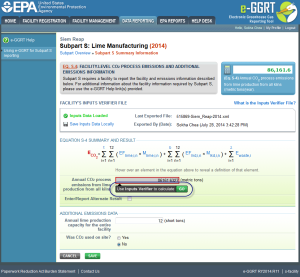
Click this link to expand In the Subpart E Summary Information page, you will see a block labeled "Use Inputs Verifier to calculate" and a green GO button, as shown in the next screenshot. Click GO to open the IVT module.
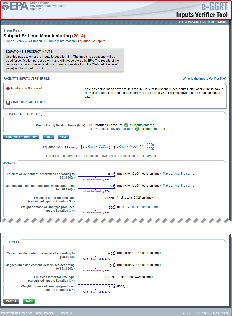
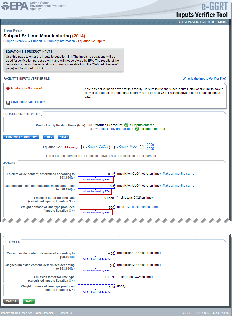
Click this link to expand This action will open the IVT module that calculates N2O emissions for subpart E facilities using the site-specific emission factor and production data method. If you have previously entered these inputs and saved your inputs file locally you should import your locally saved inputs file. If you are having trouble locating you inputs file or would like to "Reset" and recreate you inputs file, please review our help content reviewing these processes at Reloading Your Inputs Verifier File or Resetting your Facility To Create a New Inputs Verifier File. Once you enter the Inputs Verifier Tool (IVT) module you will note that these screens are formatted with a grey background and an Inputs Verifier header. Here you are asked to provide emissions inputs to allow the IVT to calculate emissions. Note that the units that you have entered into e-GGRT are listed in the UNIT INPUTS section at the top of this page. Enter the following information in the IVT module: When you have finished entering this information for the first subpart E unit, repeat these data entry steps for any other subpart E units at the facility. The IVT data entry pages for other units can be accessed by clicking on the unit names in the UNIT INPUTS section at the top of the page or the NEXT button immediately below this section. When you have completed entering equation inputs for all subpart E units, click SAVE and then click on the "Finished entering inputs" button located beneath the UNIT INPUTS section, which will return you to the Subpart E Summary Information page. As you enter data into the Inputs Verifier Tool (IVT), the system creates and "inputs file" that contains all the data that you entered into IVT. You must save your inputs file to your computer or other location that you designate. On each subsequent log in, you will be prompted to temporarily upload the latest version of the inputs file to e-GGRT. e-GGRT will not save data entered into the IVT. Users are responsible for saving their facility’s inputs file. This page shows how the IVT assists users with this task. The following example demonstrates how the inputs to equations are 1) entered, 2) saved locally, 3) temporarily loaded at a later session, 4) the screen errors you may receive, and 5) error messages you may receive if you attempt to open an inputs file that is not the most recent one saved for your facility. If you are having trouble locating your inputs file or would like to "Reset" and recreate your inputs file, please review our help content reviewing these processes at Reloading Your Inputs Verifier File or Resetting your Facility To Create a New Inputs Verifier file. To access the inputs verifier tool, users would log in to e-GGRT with their username and password, select their facility, and navigate to the "Data Reporting" section of e-GGRT.
Click this link to expand On the Data Reporting tab for the selected subpart, immediately below a reported emissions value, the user will find a button labeled "Use Inputs Verifier to calculate| GO". Clicking GO will open the inputs verifier tool for that reported emissions value. Please note that screens in the inputs verifier tool are clearly marked with a unique header indicating that you are using the IVT (shown below with red outline).
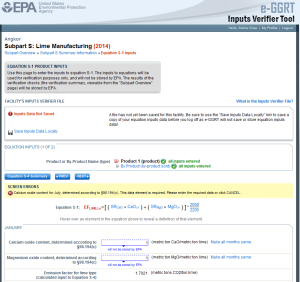
Click this link to expand Once in the IVT, the user will be able to enter inputs to equations data. An example of an inputs to equations field is outlined with red in the screen shot below. Please note that every field for inputs to equations states that the data "will not be stored by EPA". Unless you save you input files, you will need to manually re-enter this data during future data entry sessions. The screenshot below is from Subpart S and is displayed as an example. The screen for other subparts may differ slightly.
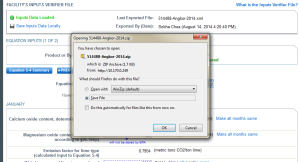
Click this link to expand Data entered into the inputs verifier module are NOT saved in e-GGRT. Only the output values from the inputs verifier module are saved in e-GGRT. Therefore, each user/facility will have to save their inputs verifier file to their local hard drive and keep track of the file for future use. On the top of each IVT screen, immediately below the grey box, IVT will present the save status of your FACILITY'S INPUTS VERIFIER FILE (File History), which contains the data entered into the inputs verifier module. To use e-GGRT in the future for your facility, you must save this file in a place where you can access it. This status box is also available on the Facility Overview page. Prior to saving your inputs verifier file, this section of the screen will state "Inputs Data Not Saved" in red letters and will provide the "Last Saved File" field. Click "Save Inputs Data" to save the inputs verifier file to your computer. This status box appears on many pages throughout e-GGRT and IVT so that it is easy for you to save inputs. However, you only need to save inputs at the completion of each data entry session. After clicking "Save Inputs Data ", you will be able to save the inputs verifier file to your computer. Please note that different browsers may allow the user to set file-saving preferences and default locations. The example shown below uses the Firefox browser. Each user’s save dialog box and defaults may appear differently, depending on the browser used. For information on browser-specific behaviors please refer to Browser-specific issues and behaviors.
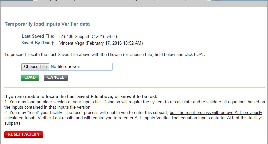
Click this link to expand Once you have saved the file, the inputs verifier file status box will display “Inputs Data Saved” in green text and the "Saved By (Date):" field that shows the name of the user who most recently saved an inputs verifier file and the date and time.” Each time you click “Save Inputs Data Locally”, the IVT will record that you have saved your inputs verifier file. The IVT does not record where you save your inputs verifier file or whether you elect to cancel this action. When you come back to e-GGRT in a later session, you will return to the FACILITY or SUPPLIER OVERVIEW web form. Here you will see the box for the FACILITY'S INPUTS VERIFIER FILE (File History), with the message that “Inputs Data Not Loaded” in red text. To load an inputs verifier file that has been previously saved, click the link labeled "Temporarily Load Inputs Data". Then browse to and select the inputs verifier file saved locally (to your local computer or local network drive). The IVT will accept the ZIP file or XML file previously downloaded by the user or a copy of that file (note: this file may be renamed but its contents must be identical). Finally, click the IMPORT button to load the file to the inputs verifier tool.
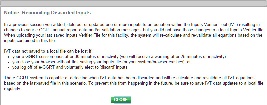
Click this link to expand If the user attempts to reload an inputs verifier file that is not the one most recently saved for the facility, the user will receive the following warning message. The system prevents the user from accidentally loading an outdated file and thus losing the most recent data. Note that you may elect to choose "I Would Like to Upload this File" and the system will attempt to reconcile all validation messages and IVT calculations (which are based on the most recently-saved file) based on the inputs contained in the old file that you are electing to load. If you elect to proceed to upload an old file, it is highly recommended that you review all equation inputs and calculations to ensure your annual report is complete and accurate.
Click this link to expand
When attempting to save inputs data during the IVT data entry process, the user may receive screen errors that indicate the user has not completely entered required data to the Inputs Verifier Tool. Screen errors must be corrected before you will be permitted to complete a save action. Once you have corrected these errors, IVT will be able to calculate the equation result and you will be able to save your inputs verifier file locally.
Click this link to expand If the user inputs and saves data in IVT, then adds, deletes, or updates one or more inputs to an equation in IVT without saving the inputs file locally and subsequently attempts to log out of e-GGRT, the following warning message will be displayed.
Click this link to expand
The user has three options: If the user clicked the LOGOUT - DISCARD EQUATION INPUTS DATA button in a previous session, the following message will be displayed the next time the user logs in.
Click this link to expand
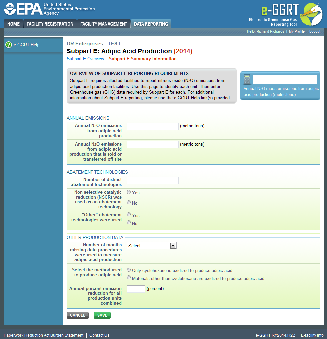
To load an inputs verifier file that has been previously saved (as would occur if you logged off and came back to e-GGRT in a later session), the user would click the link labeled "Temporarily Load Inputs Data". The user would browse to and select the inputs verifier file saved locally (to their local computer or local network drive). The IVT will accept the ZIP file or XML file previously downloaded by the user or a copy of that file (note: this file may be renamed but its contents must be identical) . The user would then click the IMPORT button to load the file to the inputs verifier tool. If you attempt to reload an inputs verifier file that is not the one most recently saved for the facility, the user will receive the following warning message. The system prevents the user from accidentally loading an outdated file and thus losing the most recent data. Note that you may elect to choose "I Would Like to Upload this File" and the system will attempt to reconcile all validation messages and IVT calculations (which are based on the most recently-saved file) based on the inputs contained in the old file that you are electing to load. If you elect to proceed to upload an old file, it is highly recommended that you review all equation inputs and calculations to ensure your annual report is complete and accurate. Subpart E also requires you to report the following information in the ABATEMENT TECHNOLOGIES section of the Subpart E Summary Information page: Subpart E also requires you to report the following information in the OTHER PRODUCTION DATA section of the Subpart E Summary Information page: When you have finished entering this information, click SAVE, which will return you to the Subpart E Overview page where you will see N2O emissions calculated by the IVT module displayed in the SUBPART E SUMMARY INFORMATION FOR THIS FACILITY table.Enter Annual N2O Emissions Using the IVT
Saving and Reloading Your Inputs Verifier File
Entering Data Using the IVT
Saving Data Entered in the IVT
Reloading an Inputs Verifier File
Screen Errors You May Receive
Enter Abatement Technologies Information
Enter Other Production Data
Subpart E Summary Information for an Administrator-Approved Alternative Method
From the Subpart E Overview page, click open in the SUBPART E SUMMARY INFORMATION FOR THIS FACILITY table.
Click this link to expand This action will take you to the Subpart E Summary Information page shown below.
Click this link to expand Enter the following information on the Subpart E Summary Information page: When you have finished entering this information, click SAVE to return to the Subpart E Overview page.
See Also


