This page provides step-by-step instructions on how to enter and edit Subpart K Ferroalloy Production emissions information for process units (electric arc furnaces) that are monitored by a Continuous Emissions Monitoring System (CEMS). The CEMS MONITORING LOCATION (CML) Summary table will only appear on the Subpart Overview page when you have added an EAF that is monitored by CEMS in the ELECTRIC ARC FURNACES (Furnaces monitored by CEMS) table.
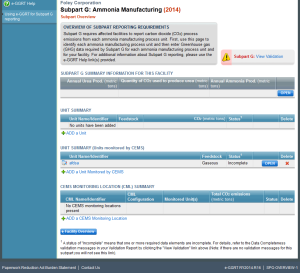
To add a CML, click the “Add a CEMS Monitoring Location” link below the CEMS MONITORING LOCATION (CML) SUMMARY table on the Subpart Overview page The screenshot below is from Subpart G and is displayed as an example. The screen for other subparts may differ slightly.
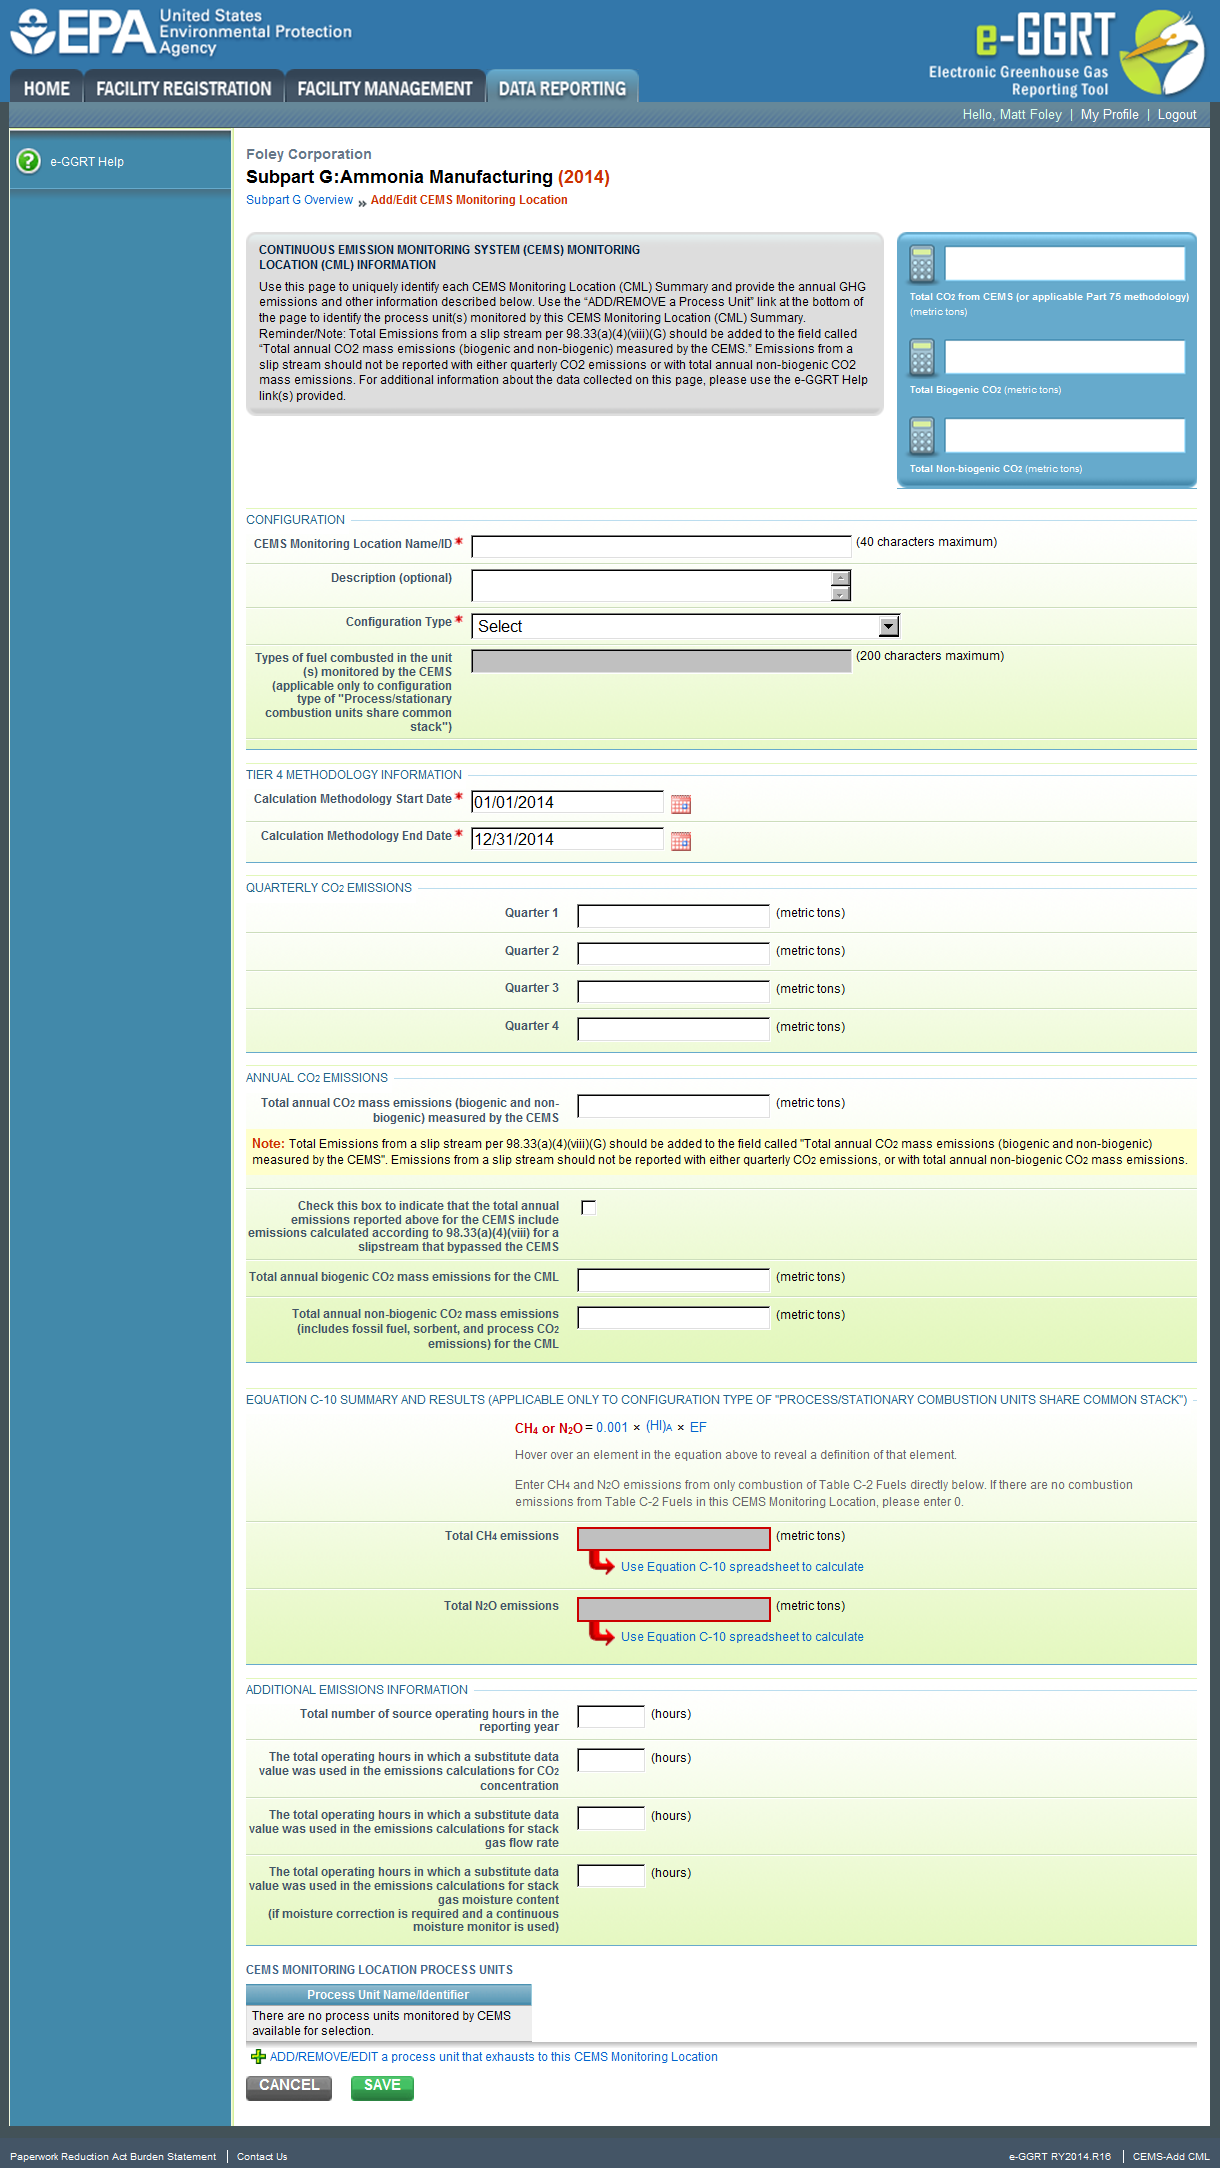
Click this link to expand For each CEMS Monitoring Location, provide the following information: Do not leave any of these fields blank. If, for example, your facility has no biogenic CO2 emissions, enter '0'. For assistance in calculating annual CH4 and N2O emissions using Equation C-10, access the optional calculation spreadsheet by clicking one of the links titled “Use Equation C-10 spreadsheet to calculate” located below each of the red emissions information data entry boxes and follow the provided instructions To identify the process units monitored at a CML, first click the link titled “ADD/REMOVE a process unit that exhausts to this CEMS Monitoring Location” at the bottom of the page The screenshot below is from Subpart G and is displayed as an example. The screen for other subparts may differ slightly.
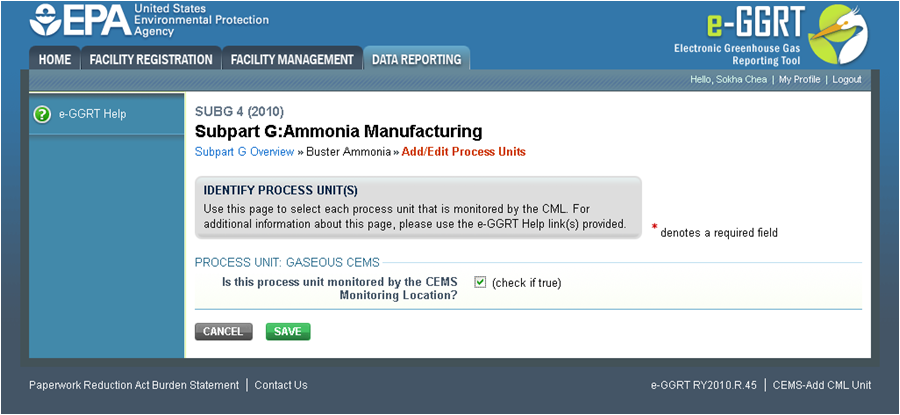
Click this link to expand On the CML Process Units Selection page, use the check boxes to select the process unit(s) monitored at this CML. This will indicate that the unit(s) selected vent emission through the stack monitored by this CML. The screenshot below is from Subpart G and is displayed as an example. The screen for other subparts will differ slightly depending on the number of units with emissions monitored by a single CML at your facility.
Click this link to expand When finished selecting process unit for the CML and entering additional required information (if applicable), click SAVE. You should then be directed back to the Add/Edit a CML Location form and see the units you selected listed in the CEMS MONITORING LOCATION (CML) PROCESS UNITS table. When you have finished entering data for a CML, click SAVE. You will then return to the Subpart Overview page. You will see the status of data entry for the CML updated to “Complete” in the Status column in the CEMS MONITORING LOCATION (CML) SUMMARY table. If you don't have all the data, you can enter some now, save it, and finish later by clicking on the hyperlinked name of the CML in the CEMS MONITORING LOCATION (CML) SUMMARY table. After you save the data on this page, the next time you open the page, the calculator on the top of the page will display the CO2 process emissions for the CML, rounded to the nearest 0.1 of a metric ton. The value displayed is for informational purposes only. Repeat Steps 1-4 until emissions information has been entered for all CMLs. If you have missed something, the validation report messages will help you identify any incomplete entries.Step 1: Add a CEMS Monitoring Location (CML)
Step 2: Define a CML and report emissions information
Step 3: Identify process units monitored at a CML
Step 4: Save entered data for a CML
Step 5: Repeat Steps 1-4
See Also
Screen Errors
Using e-GGRT to Prepare Your Subpart K Report
Subpart K Summary Information for this Facility
Subpart K Furnace Information for Furnaces NOT Monitored by CEMS
Subpart K Furnace Information for Furnaces Monitored by CEMS
Subpart K Emissions Information for Furnaces Monitored by CEMS
Subpart Validation Report


