...
To delete an EAF, click the delete icon or red "x" “x” located in the last column of the table.
| Wiki Markup |
|---|
{composition-setup}{composition-setup} |
Click image to expand 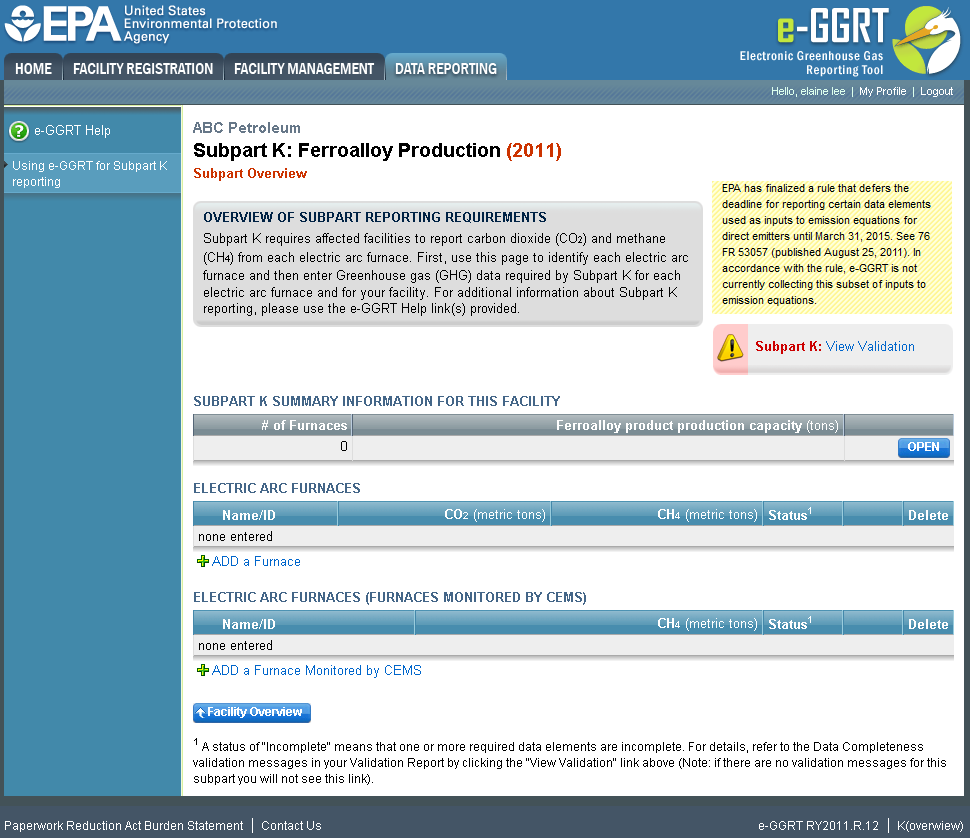
| Wiki Markup |
|---|
{cloak:id=PNG1|cloak.toggle.type=none| |
| Cloak |
|---|
cloak.toggle.zone=true} | true
| Panel |
|---|
| id | PNG1 |
|---|
| cloak.toggle.type | none |
|---|
Image Added |
Step 2: Indicate CEMS utilization for a furnace
...
Note that when adding a new EAF you are prompted to answer the CEMS question immediately (the answer to this question will default to "No" “No” for EAF added using the "ADD “ADD a Furnace" Furnace” link and will default to "Yes" “Yes” for units added using the "ADD “ADD a Furnace Monitored by CEMS" CEMS” link).
The CEMS response may be changed here and the EAF information will be relocated to the appropriate table on the Subpart Overview page.
When finished, click SAVE. You will then be directed to another Add/Edit a Unit form.
Click image to expand 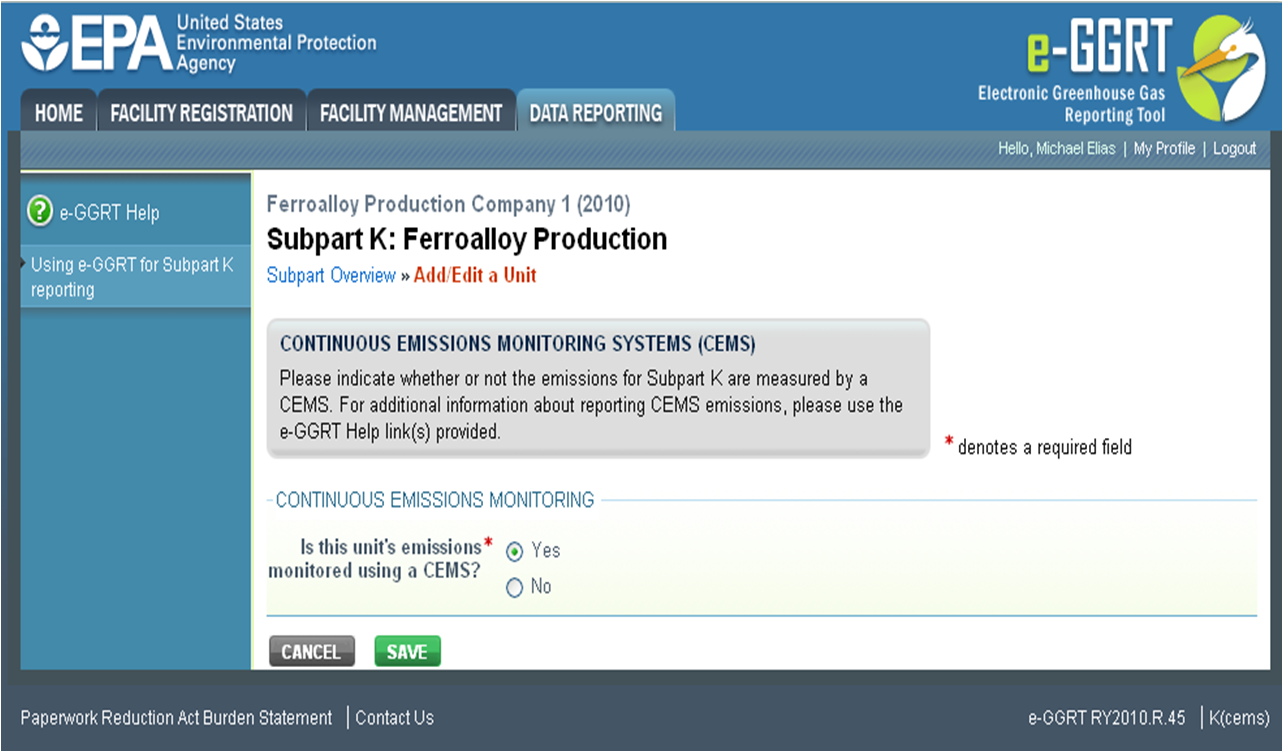
| Wiki Markup |
|---|
{cloak:id=PNG2|cloak.toggle.type=none| |
| Cloak |
|---|
cloak.toggle.zone=true} | true
| Panel |
|---|
| id | PNG2 |
|---|
| cloak.toggle.type | none |
|---|
Image Added |
Step 3: Enter required furnace information
...
- A unique name or identifier, plus optional description for this EAF (see also About Unique Unit Names)
- The inputs and outputs associated with the EAF
Click image to expand 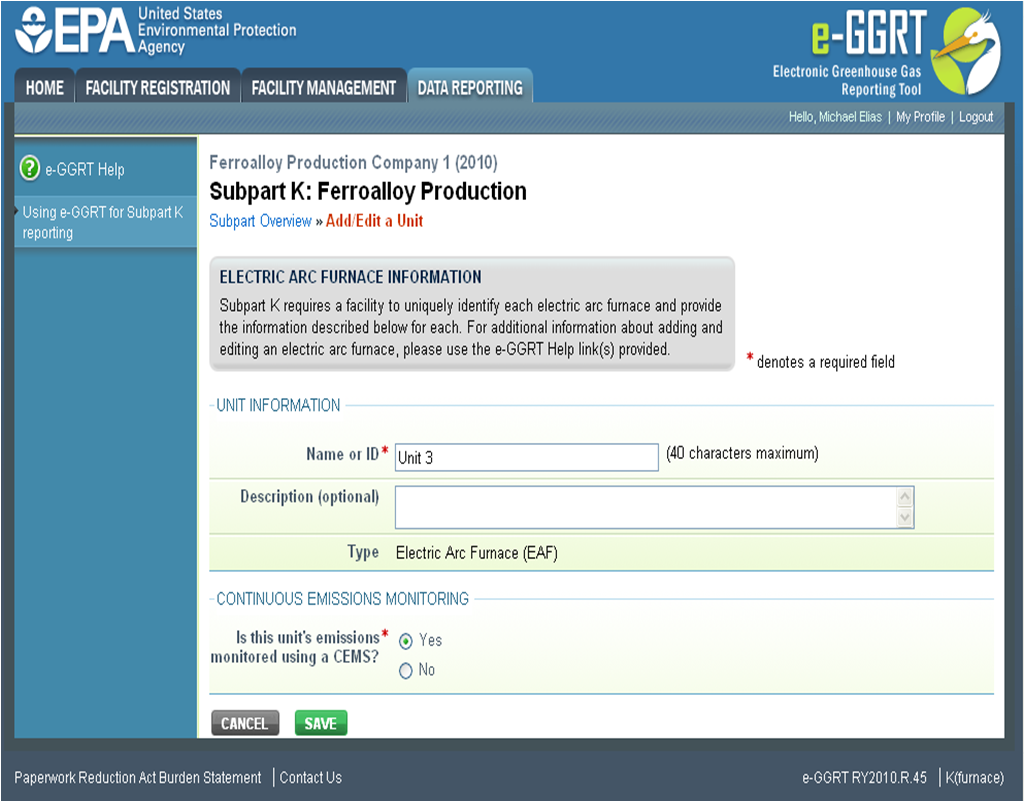
| Wiki Markup |
|---|
| Cloak |
|---|
{cloak:id=PNG3|cloak.toggle.type=none|cloak.toggle.zone=true} | true
| Panel |
|---|
| id | PNG3 |
|---|
| cloak.toggle.type | none |
|---|
Image Added |
Step 4: Enter required input/output information
...
When you are finished entering the required information for an input or output, click SAVE. You will be directed back to the Add/Edit a Unit form.
Click image to expand 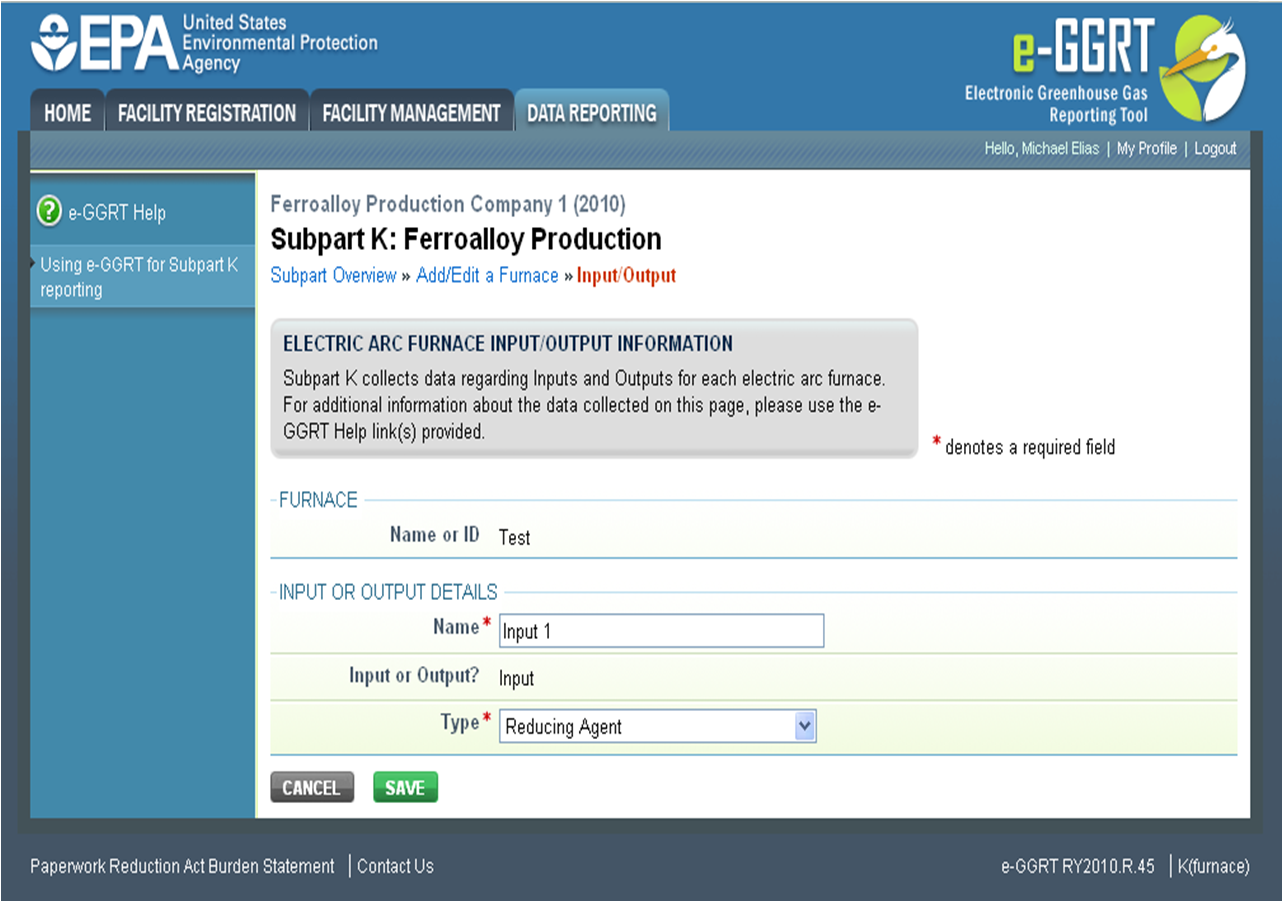
| Wiki Markup |
|---|
| Cloak |
|---|
{cloak:id=PNG4|cloak.toggle.type=none|cloak.toggle.zone=true} | true
| Panel |
|---|
Image Added |
| Wiki Markup |
|---|
{cloak} |
| id | PNG4 |
|---|
cloak.toggle.type | none |
Step 5: Save all entered information for an EAF
When you are finished entering all required information for a EAF, click SAVE. You will then be directed to the Subpart Overview page. You should see the furnace you just entered listed in the ELECTRIC ARC FURNACE table.
Click image to expand | Wiki Markup |
|---|
| Cloak |
|---|
{cloak:id=PNG5|cloak.toggle.type=none|cloak.toggle.zone=true} | true
| Panel |
|---|
Image Added |
| Wiki Markup |
|---|
{cloak} |
| id | PNG5 |
|---|
cloak.toggle.type | none |
Step 6: Repeat Steps 1-5
Repeat Steps 1-5 until all EAFs have been added for your facility. You should then see all EAFs at your facility listed in the ELECTRIC ARC FURNACE SUMMARY TABLE.
...