...
To select a facility or supplier for which to report data, find the facility or supplier in the REPORTING FACILITIES table and click OPEN.
| Wiki Markup |
|---|
{composition-setup}{composition-setup} |
Click image to expand 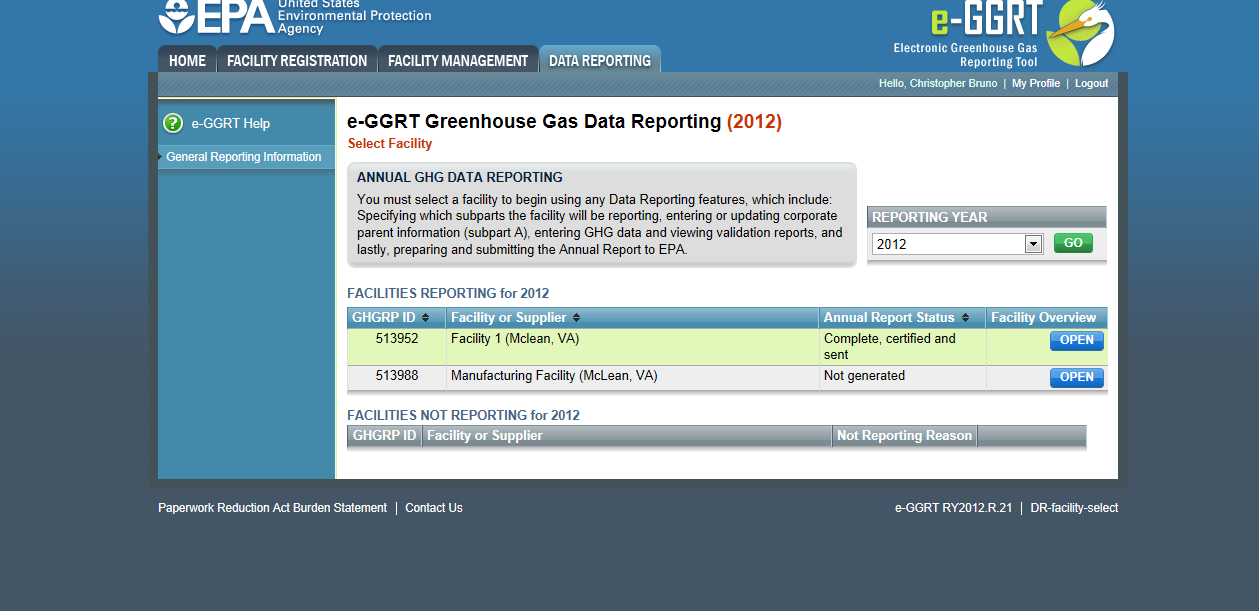
| Wiki Markup |
|---|
{cloak:id=PNG1|cloak.toggle.type=none| |
| Cloak |
|---|
cloak.toggle.zone=true} | true
| Panel |
|---|
Image Added |
| Wiki Markup |
|---|
{cloak} |
| id | PNG1 |
|---|
cloak.toggle.type | none |
Step 2. Add all applicable subparts (source or supplier categories)
The facility overview page is an overview of the facility-level information that has been entered into e-GGRT. It is like the "home page" “home page” for the facility or supplier. See the Using the Facility Overview Page for more details on how to navigate this page.
On the Facility Overview site you can also see the subparts for which you have entered data and whether any validation messages appear for a specific subpart. If you would like to learn more about the validation messages for a specific subpart, click "View Messages"“View Messages”. You can add or remove subparts from this page, and click "OPEN" “OPEN” to begin working on any subpart or add additional information to a subpart you have already been working on.
The facility overview page is also where you "generate" “generate” your report.
To add one or more subparts for the selected facility or supplier, click the link titled "ADD or REMOVE Subparts" below the REPORT DATA table on the Facility or Supplier Overview page.
| Wiki Markup |
|---|
{composition-setup}{composition-setup} |
Click image to expand 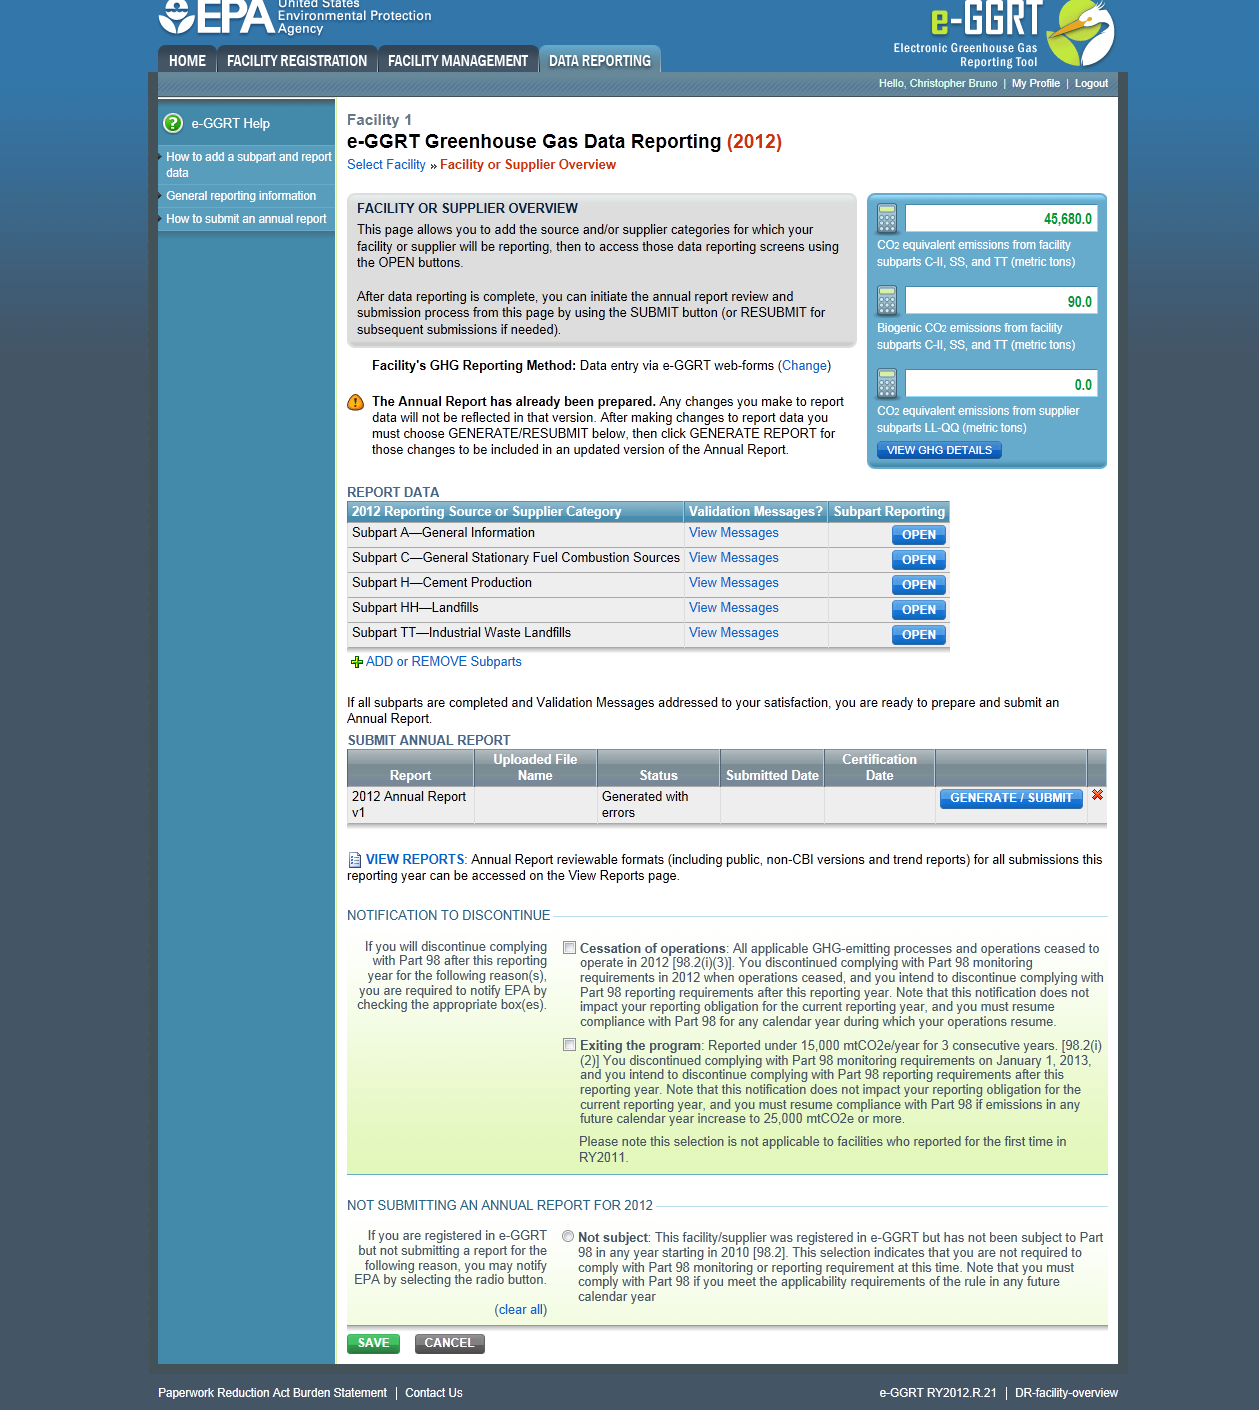
| Wiki Markup |
|---|
| Cloak |
|---|
{cloak:id=PNG2|cloak.toggle.type=none|cloak.toggle.zone=true} | true
| Panel |
|---|
Image Added |
| Wiki Markup |
|---|
{cloak} |
| id | PNG2 |
|---|
cloak.toggle.type | none |
On the Select Subparts page, use the check boxes to select all applicable subparts for this facility.
...
Once you are satisfied with your subpart selections, click "SAVE"“SAVE”. This returns you to the Facility or Supplier Overview page.
From the Overview page, you can open any Subpart that has been selected for your facility and enter GHG data.
| Wiki Markup |
|---|
{composition-setup}{composition-setup} |
Click image to expand 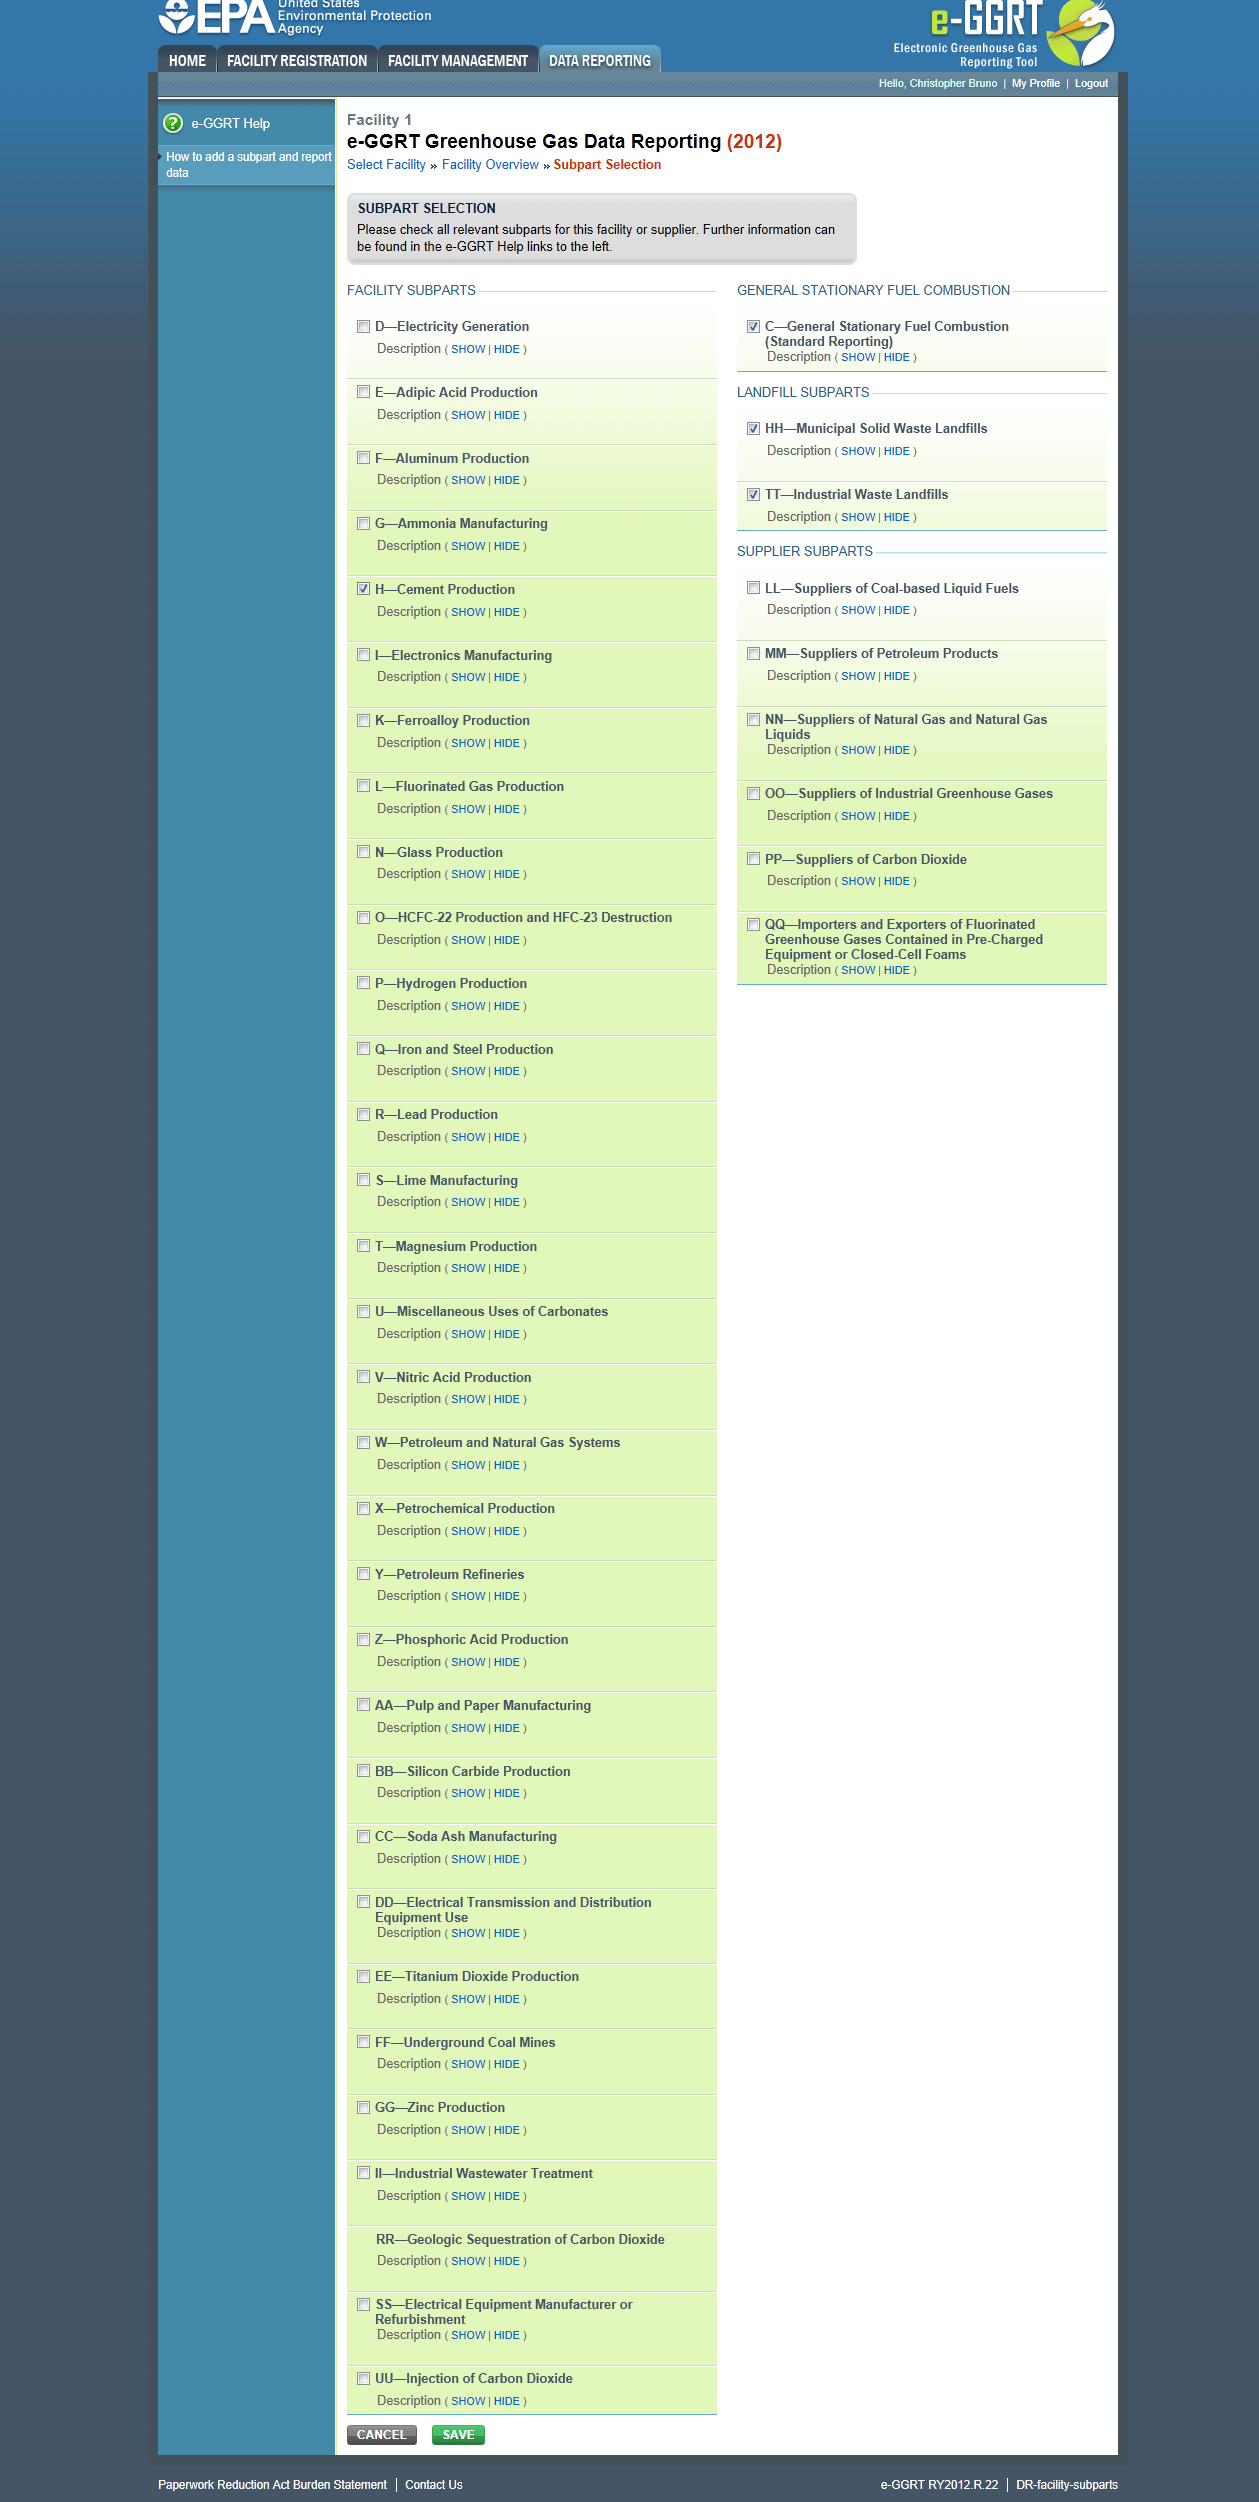
| Wiki Markup |
|---|
{cloak:id=PNG3|cloak.toggle.type=none| |
| Cloak |
|---|
cloak.toggle.zone=true} | true
| Panel |
|---|
Image Added |
| Wiki Markup |
|---|
{cloak} |
| id | PNG3 |
|---|
cloak.toggle.type | none |
Step 3. Select a subpart
To select a subpart for which to enter required information, find the subpart row in the REPORT DATA table on the Facility or Supplier Overview page and click OPEN.
| Wiki Markup |
|---|
{composition-setup}{composition-setup} |
Click image to expand | Wiki Markup |
|---|
{cloak:id=PNG4|cloak.toggle.type=none| |
| Cloak |
|---|
cloak.toggle.zone=true} | true
| Panel |
|---|
Image Added |
| Wiki Markup |
|---|
{cloak} |
| id | PNG4 |
|---|
cloak.toggle.type | none |
Step 4. Enter the required information using subpart-specific reporting instructions
To access reporting instructions for a specific subpart, click the link titled "Using e-GGRT for Subpart Reporting" in the help panel on the Subpart Overview page. Alternatively, you may access the reporting instructions for a subpart by clicking the appropriate link from list below:
| Excerpt Include |
|---|
| help:Subpart Reporting Instructionshelp: |
|---|
| nopanel | true |
|---|
| Subpart Reporting Instructions | nopanel | true |
|---|
|
Note: Screenshot of Subpart C Overview page provided below as an example.
| Wiki Markup |
|---|
{composition-setup}{composition-setup} |
Click image to expand 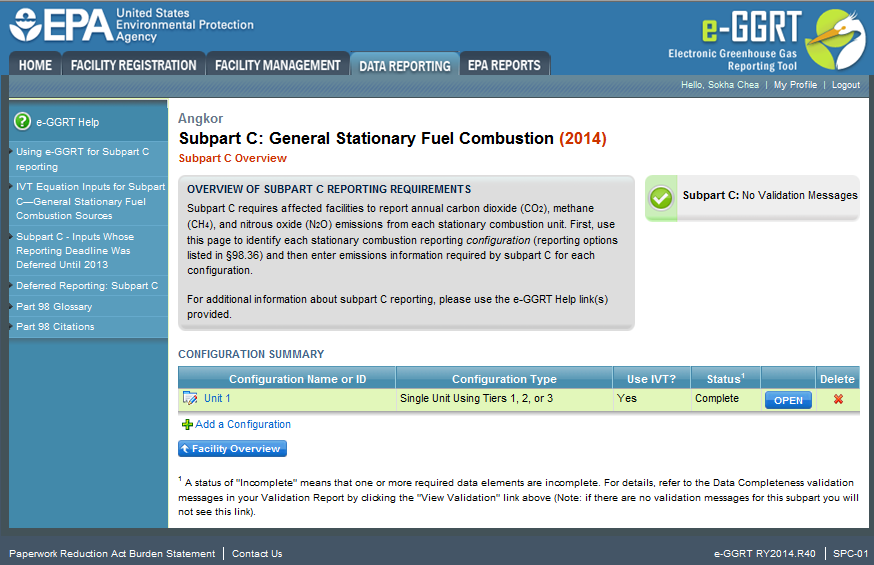
| Wiki Markup |
|---|
| Cloak |
|---|
{cloak:id=PNG5|cloak.toggle.type=none|cloak.toggle.zone=true} | true
| Panel |
|---|
Image Added |
| Wiki Markup |
|---|
{cloak} |
| id | PNG5 |
|---|
cloak.toggle.type | none |
Step 5. Repeat Steps 3-4
Repeat Steps 3-4 until you have entered the required information for each applicable subpart.